How to update TNG running on your Mac
If you are running a local copy of TNG on your Mac using MAMP, updating TNG it's not as simple as just dragging updates onto the TNG folder as there is a good chance that this will cause some files to be lost.
This guide will show you how to update the version of TNG on your Mac.
Note:
- This tutorial assumes that you have followed the guide on how to install MAMP on your Mac and are comfortable with finding the MAMP application and htdocs folder.
- This tutorial does not use or discuss the MAMP PRO application.
- In the example shown, TNG v13.0.4 is being updated to v13.1
1. Login to the downloads page on the TNG site and download the update that is appropriate for you...
Note - Depending on how your Mac and web browser are set up, the location that this file downloads to on your Mac may differ. Unless you have specifically made a change to your browser settings, it will likely download to your Downloads folder. Your browser may also be set to automatically unzip the downloaded file.
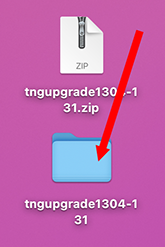
2. If the update zip file hasn't been expanded, double-click on it to unzip it...
Before we go any further, it's important to make a backup of your TNG site that is on your Mac.
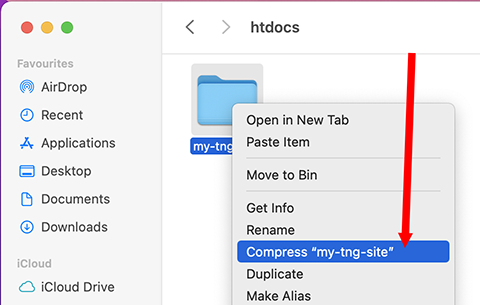
3. Go into the htdocs folder and find your local TNG folder. In this example, the folder is called "my-tng-site". Right-click (or control-click) on the folder and from the pop-up menu and choose to Compress the folder...
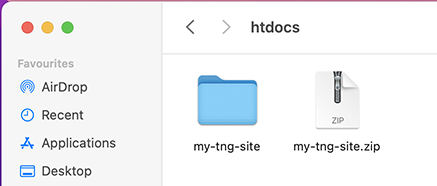
This leaves you with a zipped version of your website that you can keep.
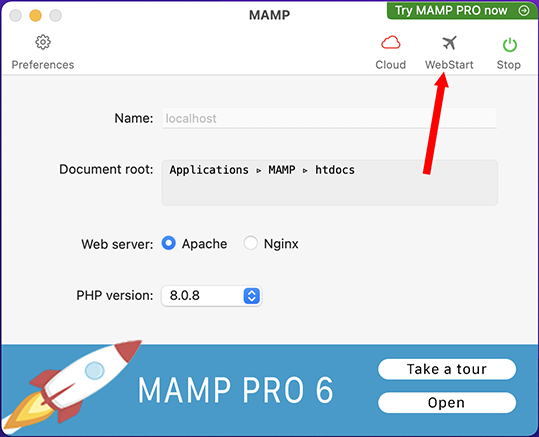
4. Time to back up the MySQL database associated with your TNG install on your Mac. Launch the MAMP application and click on WebStart if the web page hasn't opened already...
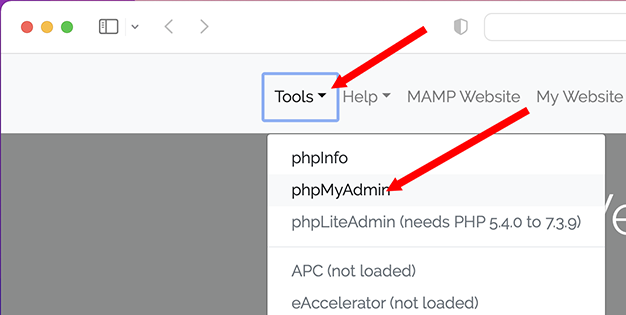
5. From the WebStart page, choose phpMyAdmin from the Tools menu to load phpMyAdmin...
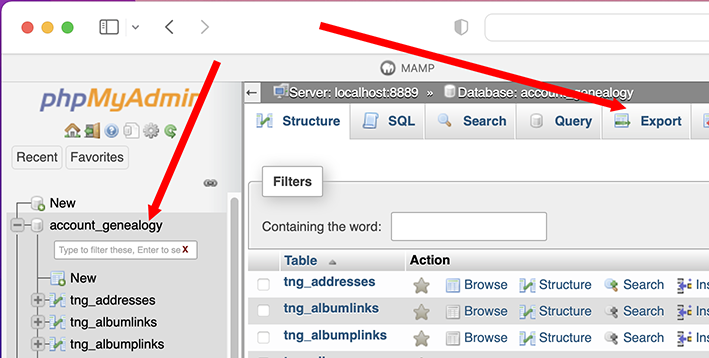
6. Click on the database name for your TNG site in the left-hand column and then click on Export...
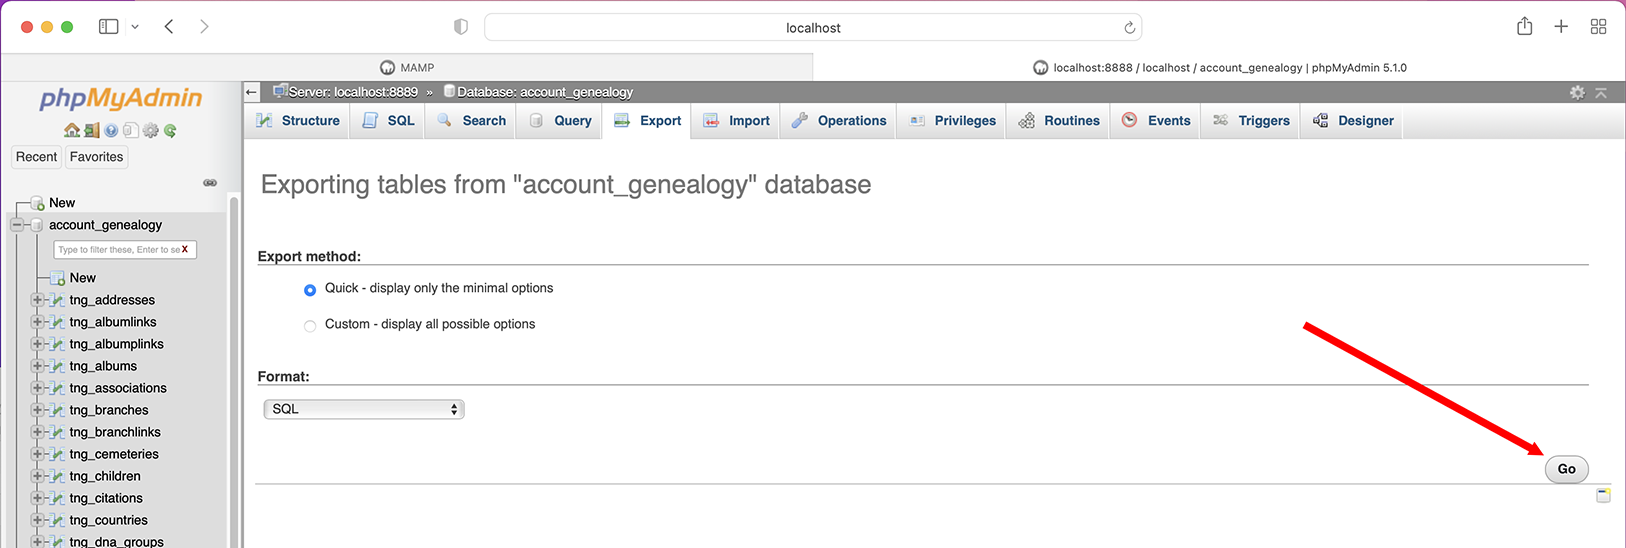
7. When the export page loads, leave the settings as you see here and click Go...
8. If your browser asks you to confirm that the file can be downloaded, click Allow...
You now have everything backed up and are ready to proceed. You have created a zipped version of your local TNG website, you have exported a copy of the SQL database, and you have the unzipped upgrade folder ready to use. Don't forget that you should also go through other activities such as uninstalling mods before applying the update - see this page for details on everything you should do.
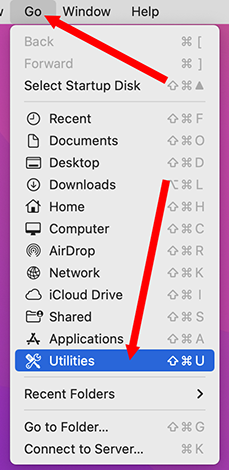
9. Time to use the Terminal application to copy the files into the TNG folder. Go to the Go menu and select Utilities...
10. Double-click on the Terminal application...
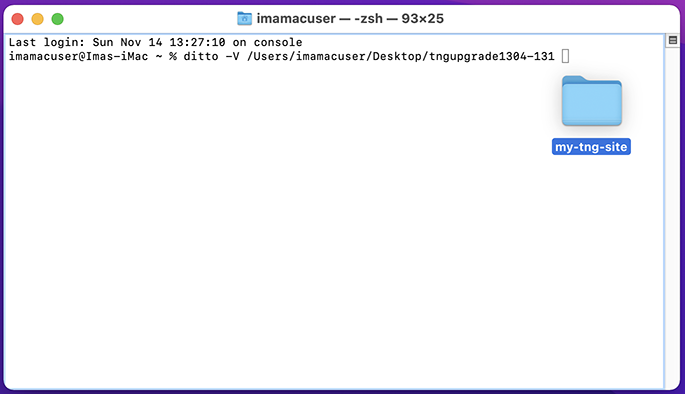
11. In the Terminal window, type the following (minus the speech-marks but including a space) "ditto -V "...
The next thing to do with this command is to list the path to the update folder and the path to the TNG website folder. There's a really easy way to add the path of each folder to this command.
12. First, drag the upgrade folder onto the Terminal window and let go, then make sure you tap the right-arrow on your keyboard...
13. Now, drag the local TNG folder onto the Terminal window and let go, then make sure you tap the right-arrow on your keyboard...
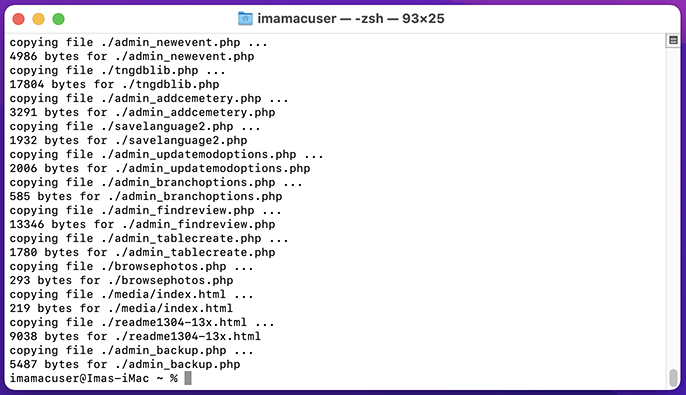
14. Now, tap the return key on your keyboard to trigger the command. You'll see a list of all the files being copied from the update folder into the TNG folder...
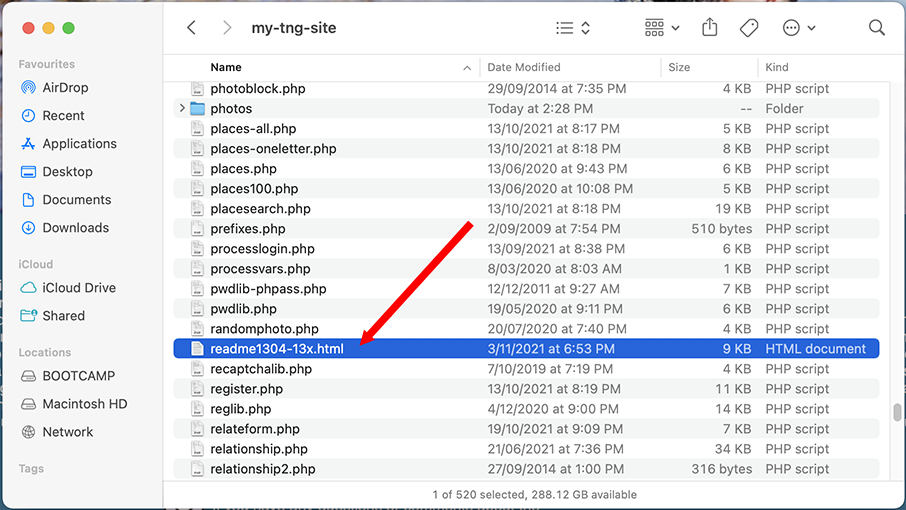
15. You've successfully copied all the updated files into your TNG folder. Now, go into the TNG folder and find the relevant "Read Me" file. DO NOT OPEN IT! Instead, take not (or copy) the name of the entire file. You're going to need it in a moment...
16. In the MAMP folder, double-click on the MAMP application to start MAMP running...
17. Get the WebStart page running and get your TNG website showing. Remember how you copied the name of the Read Me file? You need to paste that on to the end of the local web address here and then tap the return key on your keyboard to get the Read Me displaying...
The Upgrade instructions should now load...
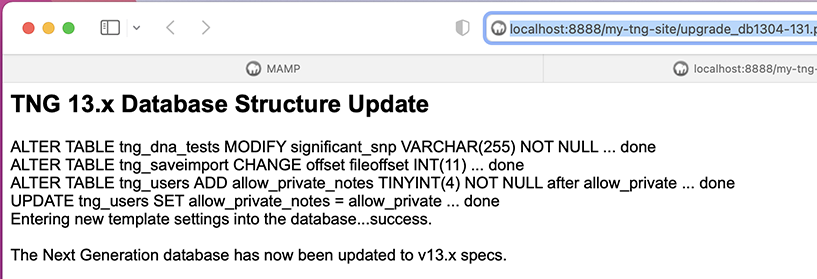
18. Work through the various stages of the upgrade process. In this example, the database needs to be upgraded (note - this tutorial does not going into the specifics of working though the upgrade)'...
And the database is upgraded.
20. The last thing you should do is remove the read me file from your local TNG folder as it is now longer needed...
Back to MAMP | Next - Copying your local TNG website from your Mac or PC to your web hosting provider for the first time

