Media - Upload
| This function was introduced with TNGv9.2 |
|
The Administration >> Media >> Upload function is very powerful. Once you select a Collection, (i.e. a Media Type), you can:
- Upload multiple files from your home computer, from different locations, thus creating Media records,
- Define a description and some other attributes for each new Media record, and
- Define multiple Media Links (links to people, families, etc.) for each new file (e.g. new Media record), or even for all of the new files.
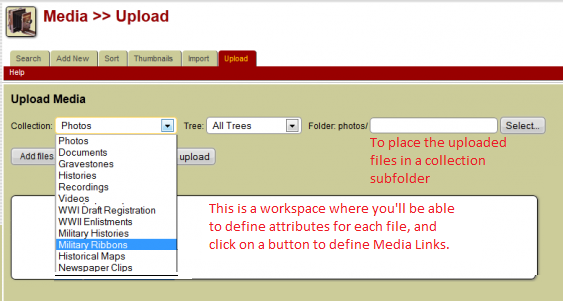
Select Collection
Start by selection a collection (i.e. a media type), a tree, and a media folder.
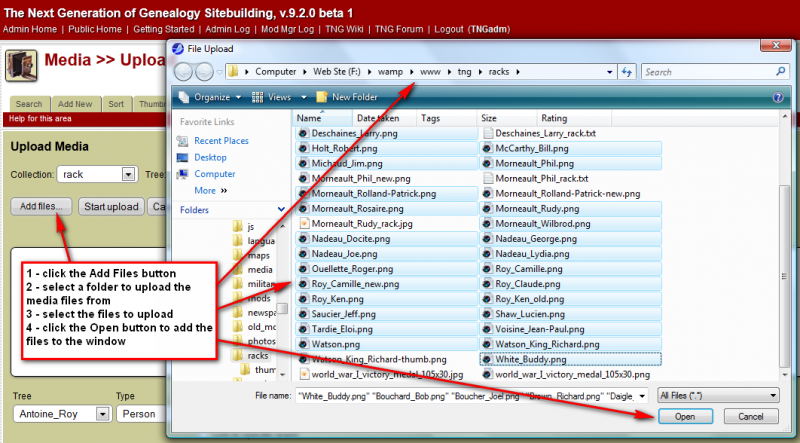
Add Files
Then,
- click the Add Files button
- select the folder on your desktop that contains the files
- select one or more files
- click the Open button to add the files to the Upload Media window
You don't have to select all of your files at once; you can select more files after selecting some files, and after starting their uploads.
Many web browsers will also allow you to drag and drop files from another window directly into the white area in the middle of the screen.

Please note that:
- If you have multiple trees in your database, and those trees use separate subfolders, and you selected a tree, your uploaded files will not be placed in the subfolder associated with the tree. They will be placed in the subfolder associated with the Collection'. You must specify the tree subfolder in the Folder selection control next to the Tree selection control in order for the file to be place in the tree subfolder.
- If you upload a file that already exists in the target folder, TNG will not balk, or report an error. Instead, it will simply add a parenthesized number (e.g. myfile(1).jpg) to the base filename, and it will create a new Media record for that new filename. You can use the #Delete button to delete such duplicates.
Start Upload
After selecting one or more files, you may
- begin the upload of all files together by clicking the Start upload button at the top of the page
- or, upload files individually by clicking the Start button next to a file.
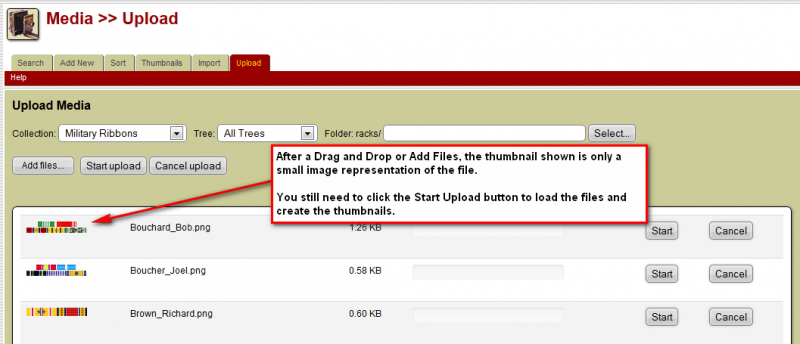
After adding files , you may see a small thumbnail representation of the image in the Upload window. Note that this is not the permanent thumbnail file tied to the image, but a temporary, calculated thumbnail.
Add Title and Description
Once each file upload has finished, fields for Title and Description are displayed. To change the default values, type in the new information and click the Save button in the immediate area. Other information can be added later from the Edit Media screen.

Media Links
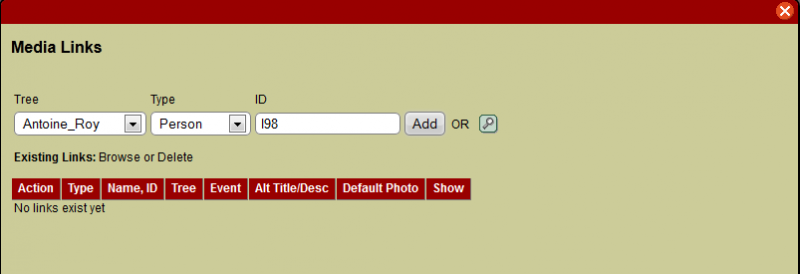
Use the Media Links button to pop-up a small window through which you can link the current Media object to to a Person, Family, Source, Repository, Source, or Place.
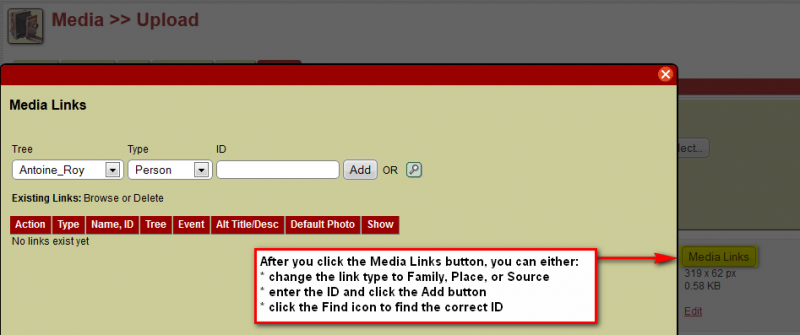
You must select the type of object you are linking to, and then either enter the appropriate ID, or use the Find button to find the ID. Then click on the Add button to create the actual Media Link.
Link to an Event
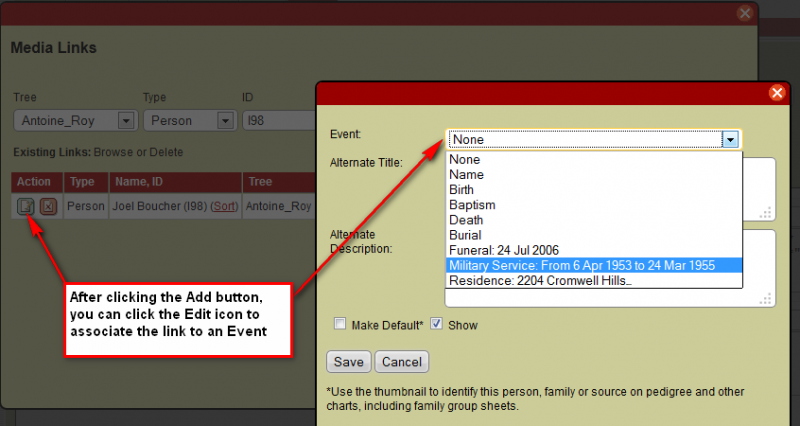
After you have added a link to a Person or Family, you can click on the Edit icon in the row representing the new link, and select an Event to link to.
Link Multiple Media Objects to one other Object
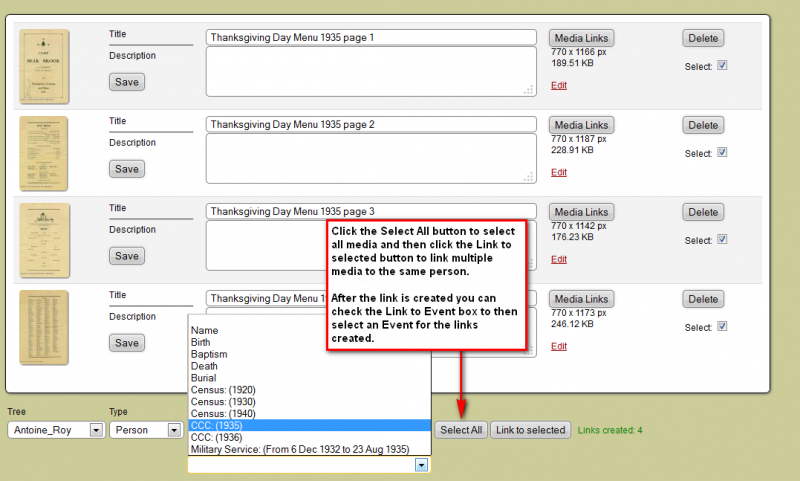
In order to link more than one new Media Object to the same Person, Family, Source (etc.), you can
- Click the Select box of more than one Media record, or
- Click the Select All button below the list of new Media records,
and then use the Link to Selected button at the bottom of the screen to create those links.
After the links are created, you can check the Link to specific event checkbox box to then focus the links you just created on a specific subordinate event.
Edit
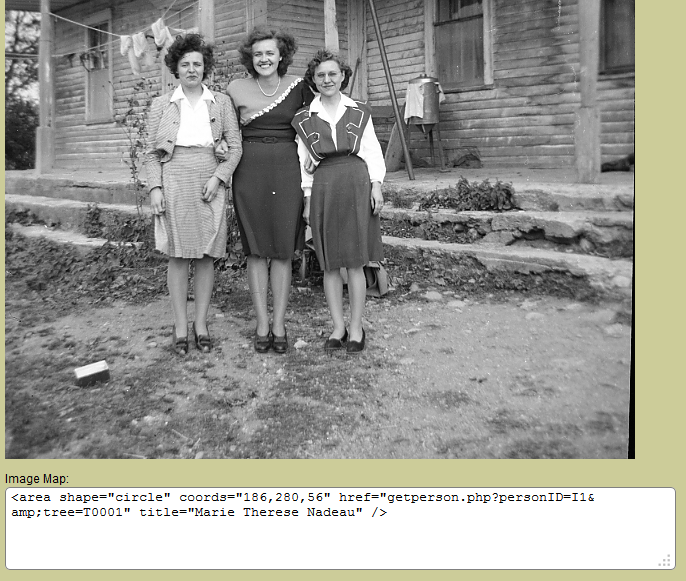
Either before or after you create Media Links for a new Media object, you can click on the Edit link associated with the new Media object to edit that new Media record.

You can even add an Image Map.
Delete
If you decide for any reason that you do not want the new file and new Media record after all, then you can use the Delete button associated with the new Media record to remove the duplicate file and record (and possible new thumbnail).
Note that a Delete operation on the Media Upload screen behaves differently from the Delete operation on the Media Search screen. On the Search screen, only the Media record is deleted, not the actual files.

TNG V10 Enhancement
| TNG version: | ≥ 10.0 |
In TNG V10, the Media Upload page will now show a green check mark next to each uploaded image to show that everything for that image has already been saved. If the title or description is then edited, the check will change to a Save button.
Once the Save button is clicked, the changes will be saved and the mark will once again be displayed. This should make it much easier for admins to see what is and is not yet saved.

Related Links
Media Overview
Setup - Media
Using Collections
- Media - Collections
- External Link Collection
- Media - Add New - Collection
- Media - Add New - Collection (Military Ribbons example)
Adding Media
- Getting Media into TNG - A summary of the various techniques.
- Add New Media - Linked to Person or Family - For Editors as well as Administrators
- Media - Add New - Import one multimedia file into TNG. Then link its new Media record to other objects.
- Histories - Creating - Create a new TNG Media record without importing a multimedia file into TNG.
- Media - Import - Import files that are already on the server, but not already defined as Media records.
- Media - Upload - Upload several media files, import them into TNG, and link them (individually or collectively) to other objects.
- Import Media Using GEDCOM - Upload new media files that are referenced inside of a uploaded GEDCOM file.
Body Text
- Editing Body Text & Body Text with Image an example of adding Body Text to an image
Thumbnails
- Media - Default Images on how to create default images
- Media - Thumbnails - Moving
Image Maps
| TNG version: | ≤ 12.3.0 |
| TNG version: | ≥ 7.0 |
Information on Image Maps apply to TNG versions prior to TNG 13
Image Tags
| TNG version: | ≥ 13.0.0 |
Information on Image Tags apply to TNG v13 and later
Other Useful Articles
- Batch updates of IPTC tags using IrfanView
- Folios on how to handle multi-page documents as if it were a single TNG media object
- Folios - Examples
- Media Functions on how to hook videos into TNG
- Preserving Digital Photos